Integrating Google OAuth in Rails - Part 1
Have you ever had to integrate OAuth? Integrate with Google? No?! Cool.
This series is focused on helping you integrate with Google APIs fairly quickly. I’m going to show you how to 1) create events for your users google calendar and 2) manage incoming/outgoing communication via Gmail right within your app.
For this first part, we’ll be setting up our app in Google’s developer console. So let’s get started!
You’ll need to follow along at console.developers.google.com.
First, let’s create a new project. You can name it anything, for my personal set up - I have 3 projects:
- Development (local)
- Staging
- Production
I do this to separate out each environment. For the sake of this article, I’m just using the default name filled in by Google.
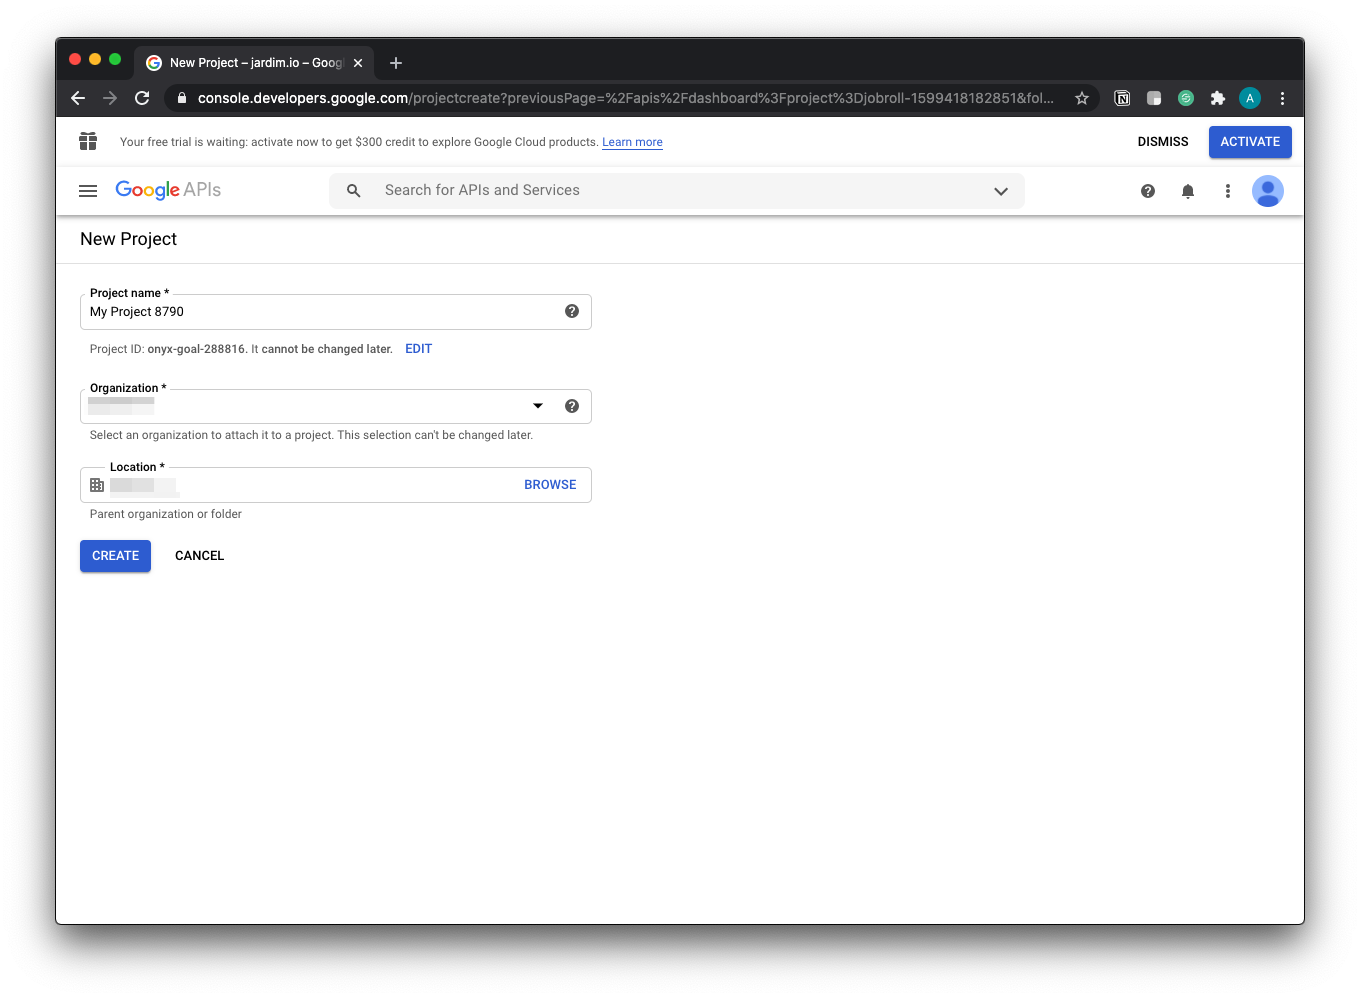
Once the project is created, you’ll see the following dashboard:
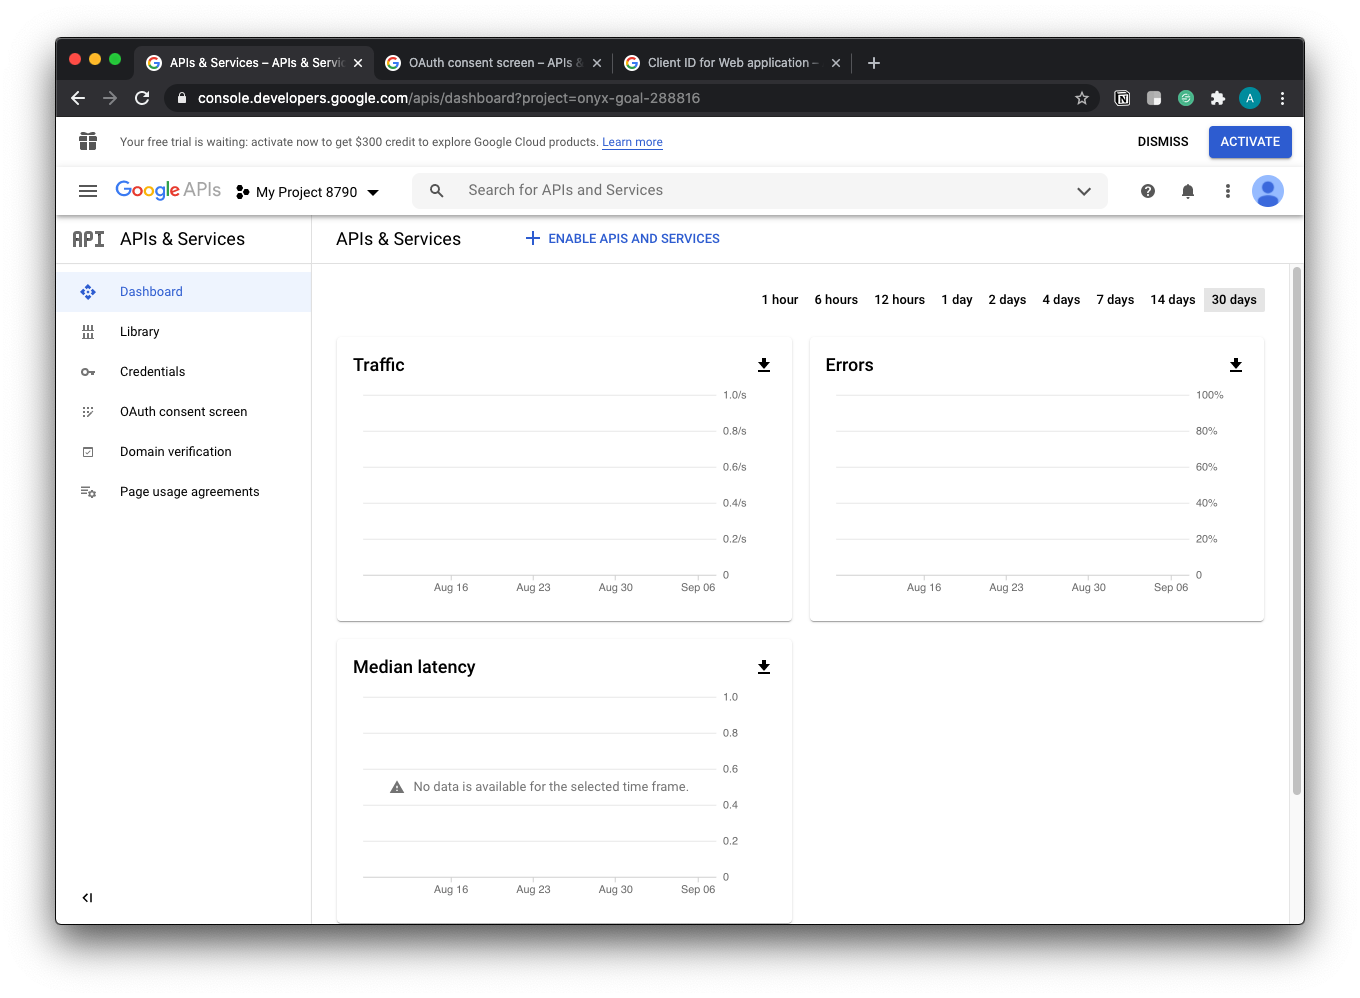
We need to enable the API’s we’ll be using. In this series, I’m adding Calendar and Gmail. Let me show you how can do this fairly easily for Google Calendar.
Click on “ENAABLE APIS AND SERVICES” button in the middle of top bar next to “APIs & Services”.
You’ll be taken to the following page:
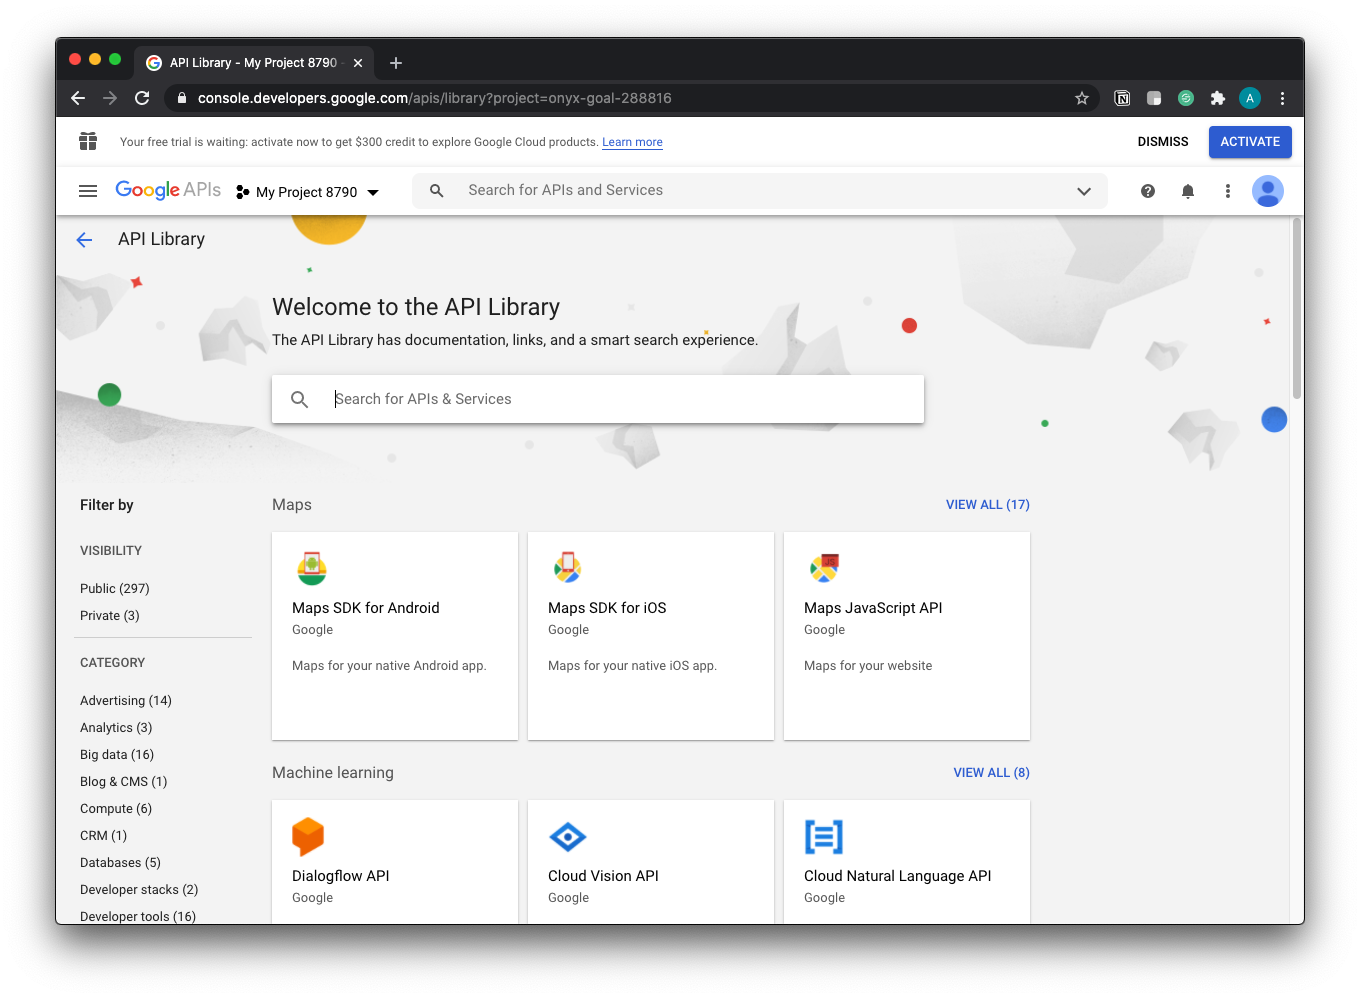
In the search bar, type in “Calendar”. This should give you the following results:
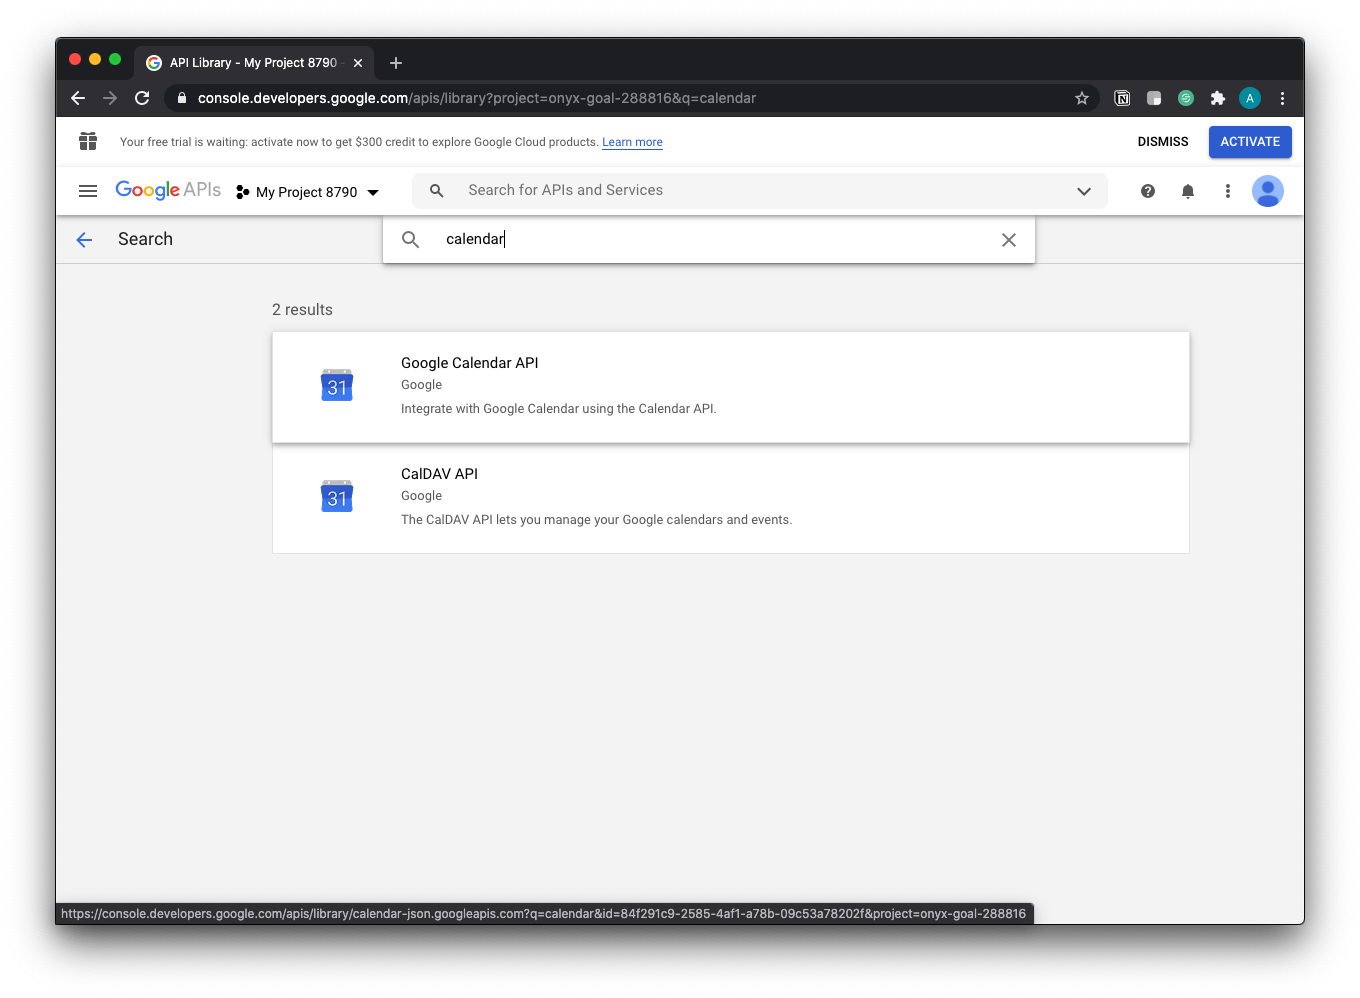
Click on the first result, “Google Calendar API”. You should then be taken to:
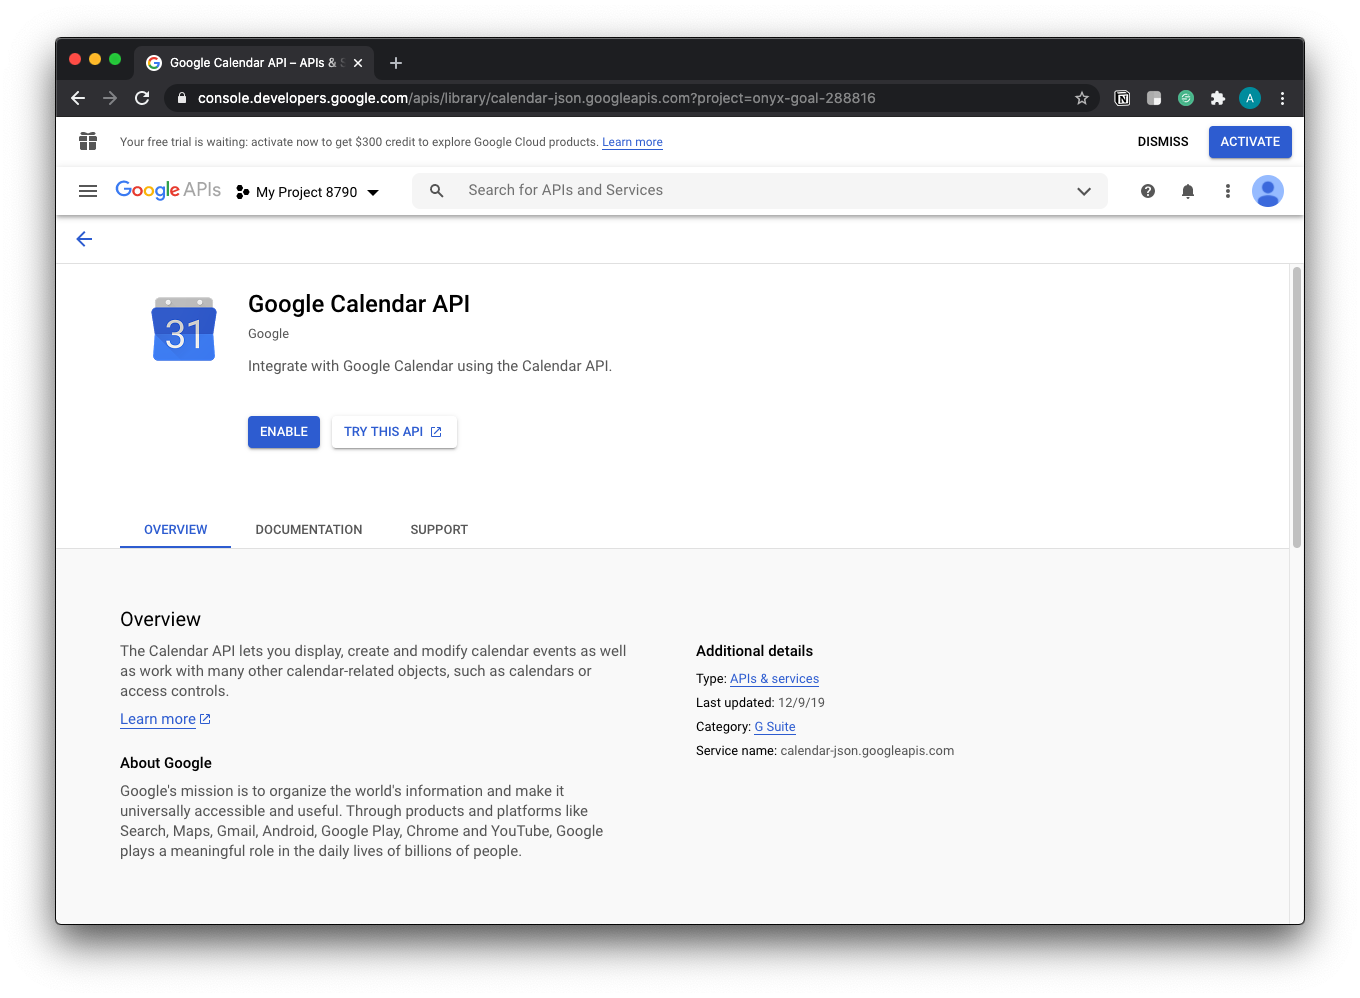
Click on the blue “Enable” button. Once enabled, you’ll be taken to:

Here, you’ll want to click on “Create Credentials” button at the top right of the content area.
This will take you to a wizard, where you’ll fill in a few questions:

For the “Which API are you using?”, select “Google Calendar API”.
For the “Where will you be calling the API from?”, select “Web server (e.g. nodejs, Tomcat)”
For “What data will you be accessing?”, select “User data”.
Your options should match:

There should be a blue highlighted button, “What credetnials do I need?“. Click that button.
You will receive a modal to “Set up OAuth consent screen”:

Click on “Set up consent screen”. This will open up a new tab:
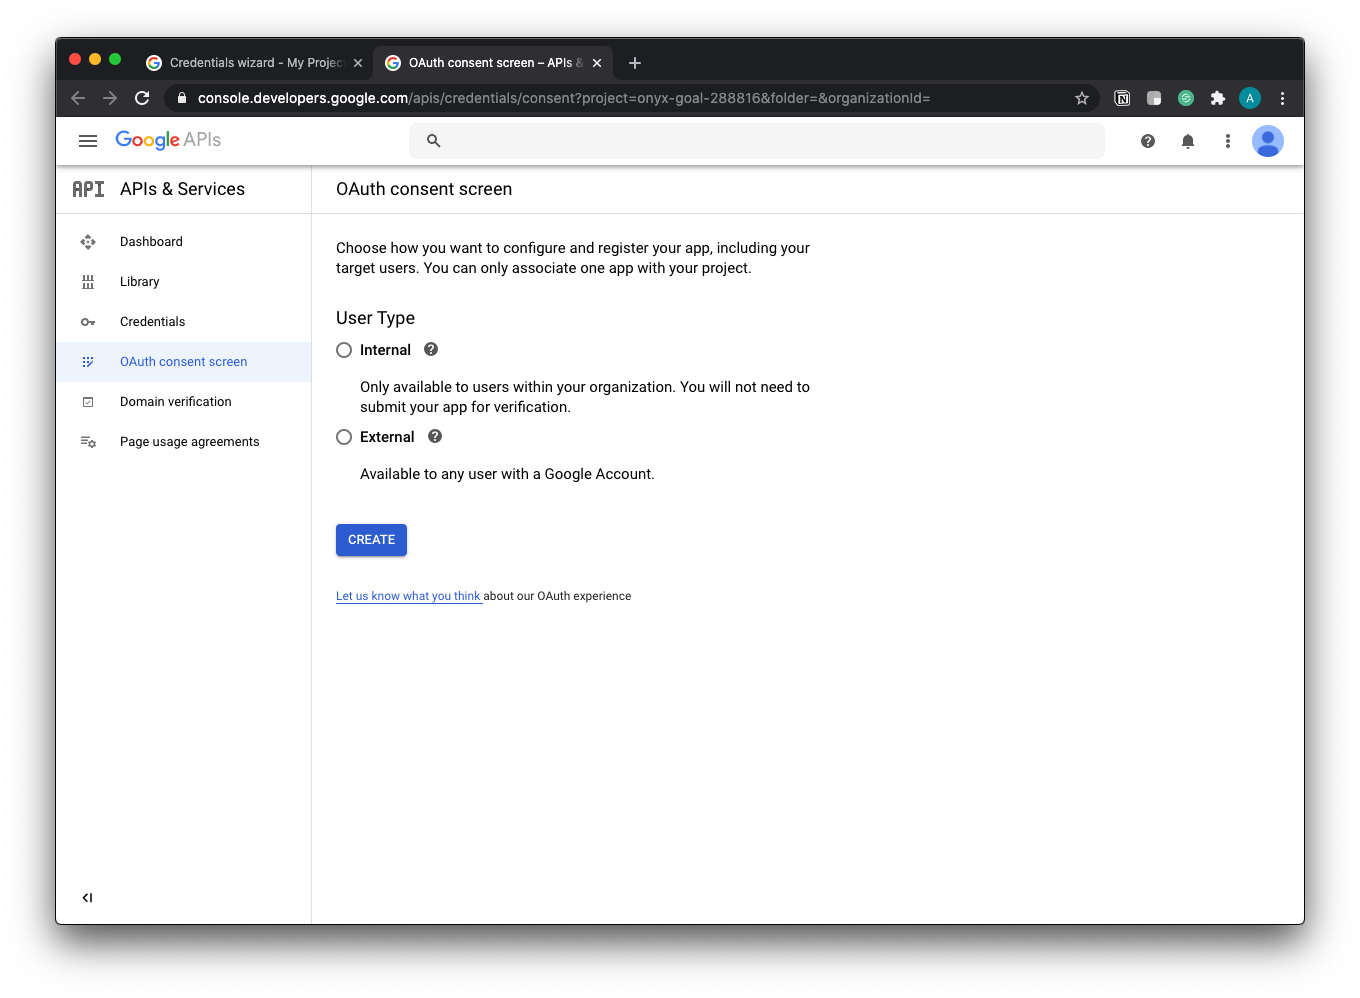
Select “External” for User Type and click “Create”.
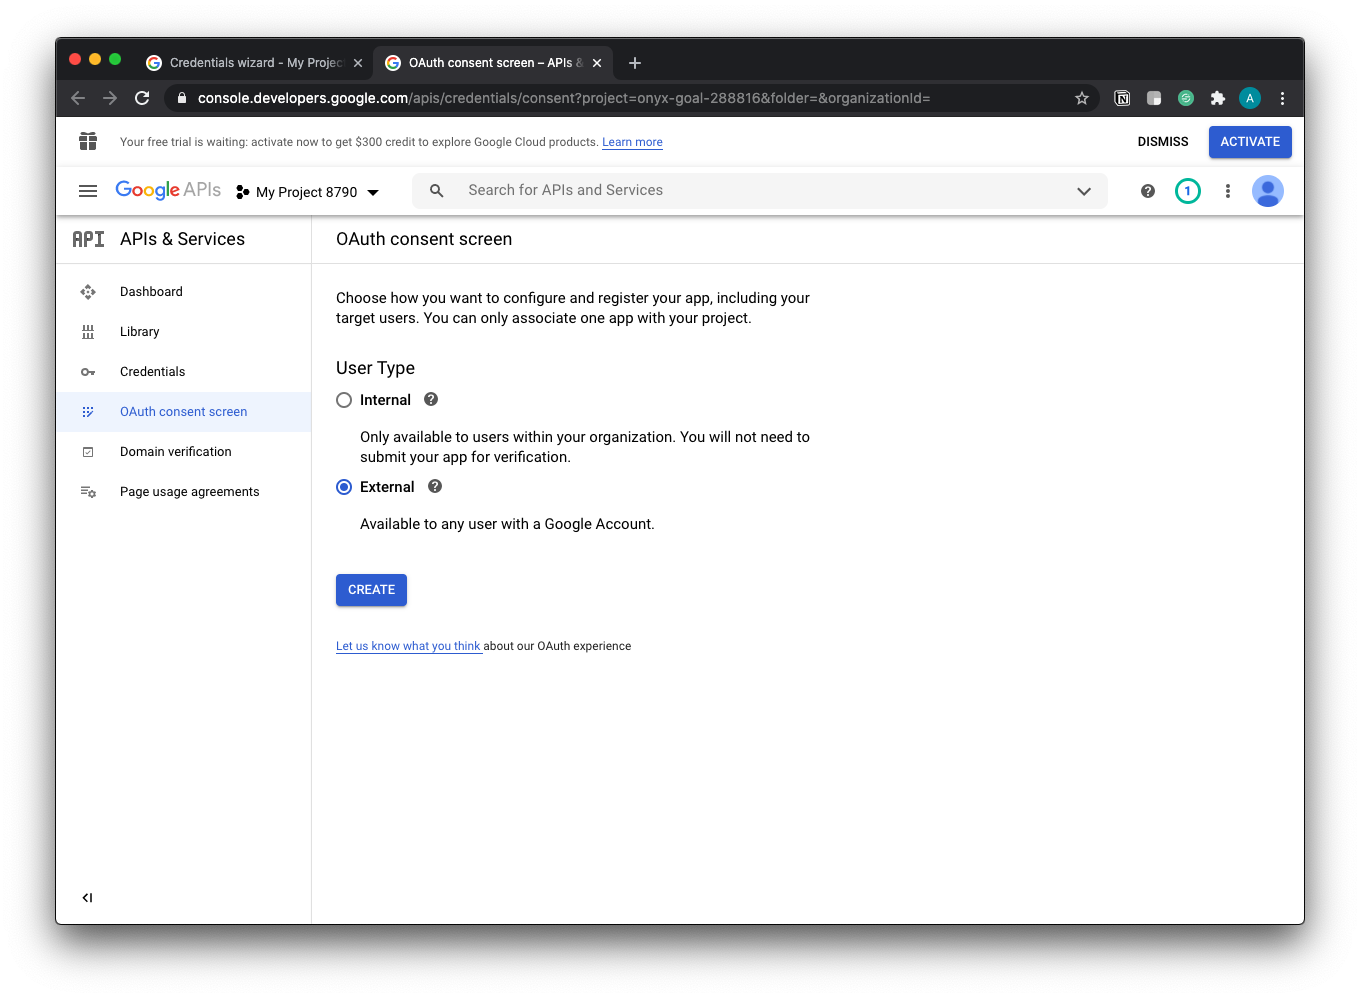
You will then be taken to the “OAuth consent screen”, where you will fill in details about your app.

For “Application Type”, select “Public”.
For “Application name”, fill in the name for your app - in the screenshot below I use “My Awesome App”.
Scroll to the bottom of the page and click “Save”.
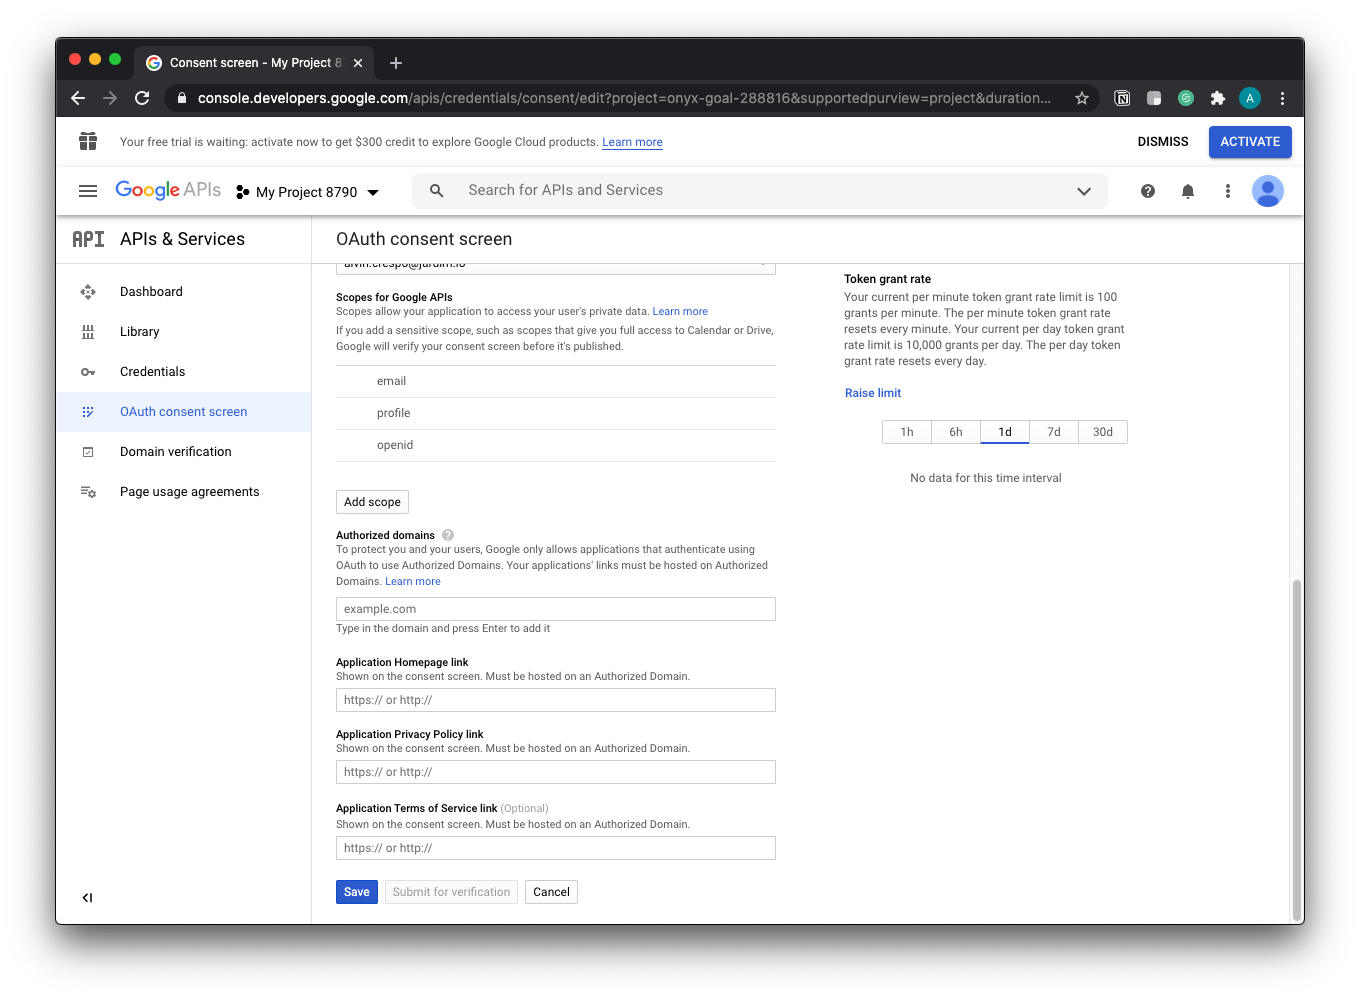
Once the settings have been saved, go back to the first tab to set up credentials.
Now, we’re going to create the Client ID.
Fill in the name for the client ID, I’m using “myoauth”.
Then, click on “refresh”.

Once refresh is completed, you’ll see the “Create OAuth client ID” button.
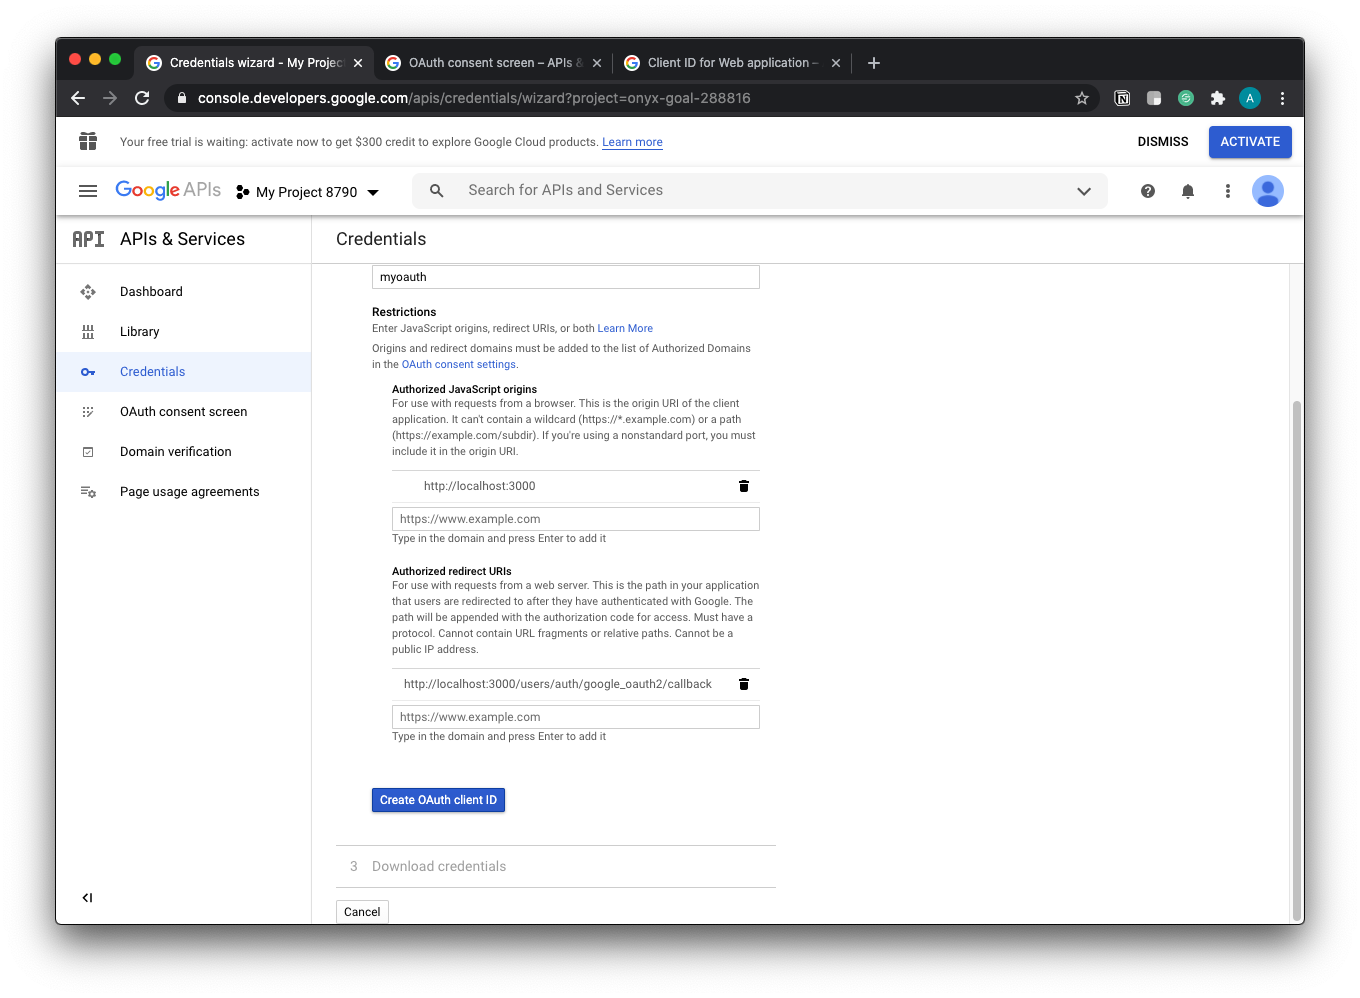
This will create the credentials you’ll use to authenticate.
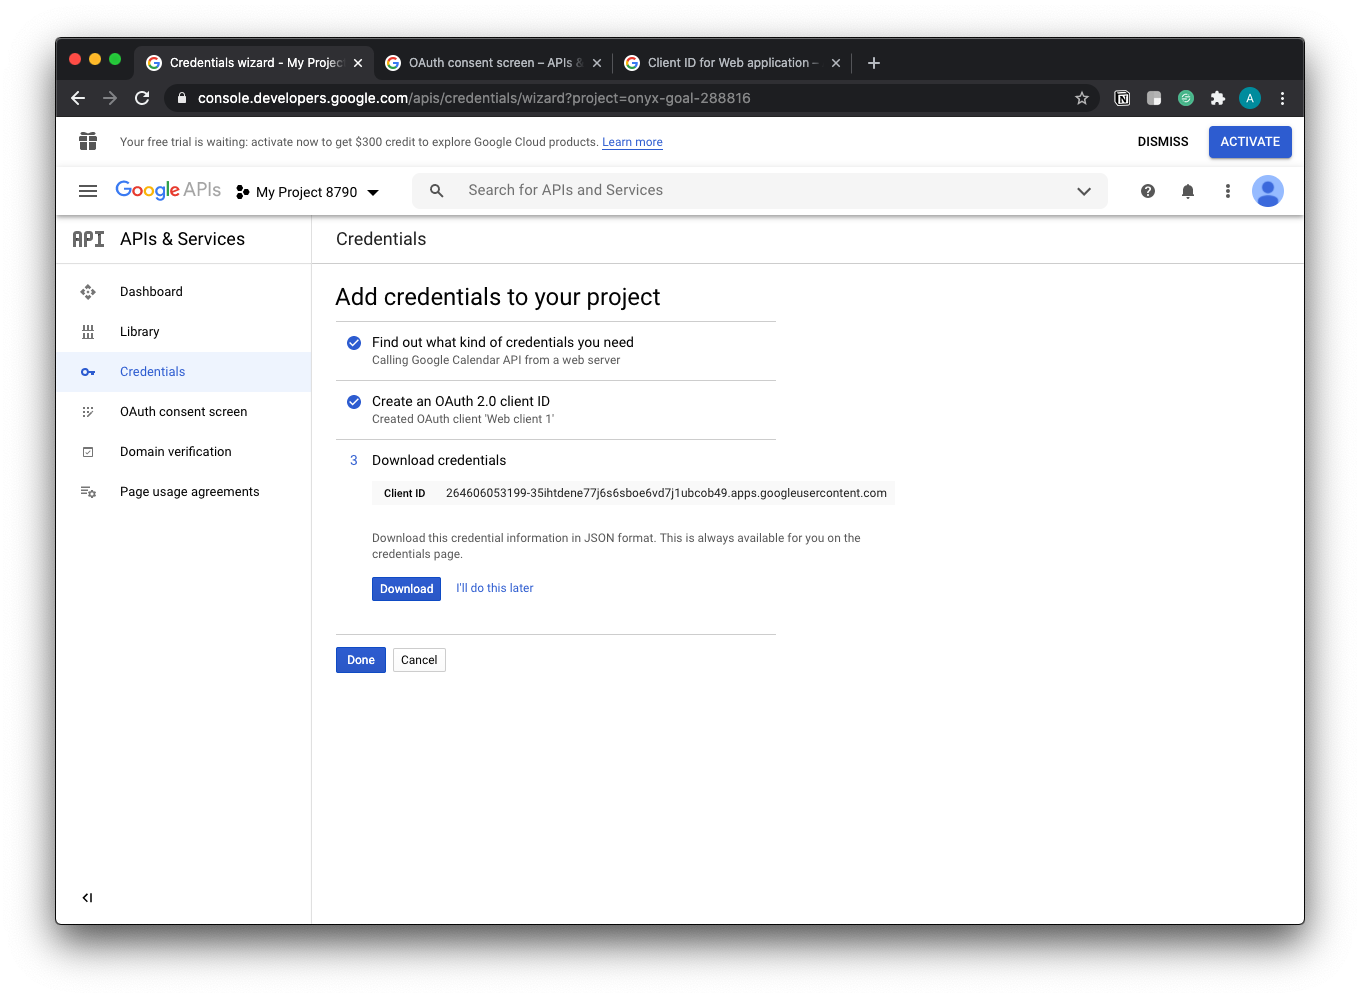
Download these credentials and keep them safe. I tend to upload these to my personal 1Password account.
Finally, click on “Done”.
You’ll be taken to the Credentials dashboard.

Here you’ll see the credentials you created.
Congratulations! 🎆🎆🎆
You have successfully set up credentials for your integration with Google API’s. This specific intro set up Calendar. You’ll want to go in and set up Gmail next. I’ll let you tackle that one on your own. Don’t worry though, I’ll be creating a separate post for Gmail API’s - but that’ll come later.
Either way, the next part is setting up your Rails app to integrate with Google Calendar.
Thanks for reading and definitely check back for the next part in the series.
Jump to top of page